Roasted Garlic Bread

Is there anything better with an Italian meal than garlic bread? Frankly, this garlic bread is a bit more sophisticated than your average garlic bread so I would even serve this for friends at a dinner party. Roasting the garlic brings out the sweet, nutty flavor and eliminates the strong, overpowering flavor from raw garlic. Slathered on a loaf of Italian bread and toasted under the broiler is the traditional version but this mixture of roasted garlic, parmesan, etc. would be a great spread with sliced bread too. Either way, it’s worth making!

Step 1: Cut the tops off two heads of garlic, drizzle with olive oil and sprinkle with kosher salt. Wrap them in foil and bake in the oven at 350 until soft and golden, about an hour.

Step 2: While the garlic cooks, in a bowl mix 2 tbs. grated parmesan cheese, 2 tbs. mayo, 2 tbs. parsley and 2/3s stick of butter (room temp).

Step 3: Once the garlic is cooked, let it cool for a few minutes and then squeeze the garlic cloves out of the casing into the other ingredients.

Step 4: Slice a loaf of Italian bread in half from end to end and top with the mixture. Place on a cookie sheet under the broiler till golden and toasted. (I usually put the sheet on the lower part of the oven to make sure the bread doesn’t cook too quickly).

Enjoy!

Peachy Keen Cake

Mid-August is the perfect time to enjoy fresh, ripe Summer peaches.  They are worth waiting for and once they are here – like so many other Summer fruits and vegetables – I try to come up with lots of ways to use them.  I’m trying to expand my baking repertoire (honestly, I’m not much of a baker) and I couldn’t walk past the basket of fresh peaches at the @summitfarmersmarket. Peach cobbler, crisps, pies and crostatas are all great but I’ve been in a cake mood so I set out to find the perfect cake recipe.  I found one in the America’s Test Kitchen’s 20th Anniversary Cookbook but I made a few edits (the first was not including peach schnapps – my peaches were so fresh, they didn’t need any enhancements!).  There were a few more steps than other recipes but they are worth it.  Peaches give off lots of liquid and this recipe helps eliminate a potentially soggy bottom.   I use fresh peaches but you could probably do this with frozen though I would defrost them first to help cut down on the added liquid.

Ingredients

2 ½ lbs               Fresh peaches (peeled, pitted and cut in half)

4 tsp                    Fresh lemon juice

¾ cup                  Sugar

1 cup                   Flour

1 ¼ tsp                Baking powder

¾ tsp                   Salt

½ cup                  Light brown sugar, packed

2                           Eggs, large

8 tbs                    Melted and cooled butter

¼ cup                  Sour cream

3 tbs                    Super fine flour (Wondra is one of my secret weapons!)

1/3 cup               Raw sugar

Preparation

Pre-heat oven to 425.

Cut some of the peach halves into wedges (about 24), toss them in 2 tsp lemon juice and 3 tbs sugar – set aside.  Dice the rest of the peaches into large chunks and mix the chunks with the remaining 2 tsp of lemon juice and 2 tbs of sugar.  Place the diced peaches in a strainer for 5 minutes and reserve the liquid.  Line a cookie sheet with foil and parchment paper and spread the diced peaches in a single layer.  Place in the oven for 20 minutes to extract additional juices.  Remove from the pan and let the peaches cool.  Reduce the oven temperature to 350.

In a large bowl, whisk the flour, baking powder and salt together.  Combine the brown sugar, 1/3 cup sugar, and eggs in a bowl till mixed.  Add the sour cream and vanilla, mixing well.  Slowly add the melted and cooled butter.  Combine well with the flour mixture but don’t overmix.

Grease and flour a springform pan.  Add half the batter and scatter the cooled peache chunks over the batter, lightly pressing them into the batter.  Sprinkle the super fine flour over the peaches and top with the remaining batter making sure to cover the peaches. 

Arrange the peach wedges on top in a circle making sure to fill the center as well.  Sprinkle the entire top generously with the raw sugar and bake, rotating the pan once, until an inserted toothpick comes out clean (about an hour). Once you remove the cake from the oven, run a sharp knife around the edges and let the cake cool in the pan for 15 minutes before removing the outer ring.  Let the cake cool completely for a few hours before serving.

I served slices with whipped cream but vanilla ice cream would be great, too.

Blueberry Crumble

It’s always a great day when the first crumble of the season goes into the oven.  Yes, I could (and do) make fruit crumbles during the year but there is something about the fresh fruit of the Summer that makes baking so special.  Pies, muffins, crumbles – I love baking them all and thankfully my family loves eating them.  My favorite crumble ingredient is in the topping – oats.  They really give the topping great texture and more depth than just sugar, butter and flour.  Beyond the fruit, it’s the star of the show.

Speaking of fruit, I use this same recipe regardless of the fruit with some minor additions.  The topping is always the same but when I make a peach (or cherry) crumble, I omit the lemon and add ½ tsp of almond extract and apples get ½ tsp of cinnamon.  This is such a versatile recipe and the perfect dessert for a pot luck, picnic or if you are bringing something to a friend.  It can be served warm or room temperature and I’ve frequently made it a few hours before I bring it somewhere and it’s perfect by the time we are ready to enjoy it.  Ice cream or whipped cream are never a bad addition but this crumble is great alone too.    

Ingredients

Filling

4 c                    Blueberries (preferably fresh but frozen is fine)

½ c                  Sugar

3 tbs                 Corn starch

2 tbs                 Lemon juice, freshly squeezed

                        Zest from one lemon

Crumb Topping

1/3 c                 Brown sugar, firmly packed

¾ c                  Flour

¾ c                  Sugar

1 c                    Old fashioned oats (not instant) (I use Quaker)

½ tsp               Salt

1 stick               Butter cut into piece, room temperature

Preparation

Pre-heat your oven to 350.

In a bowl combine all the ingredients for the filling, set aside.

In a separate bowl for the crumb topping, combine the brown sugar, flour, sugar, oats and salt.  Add the butter and mix till combined and the topping holds together.  I use my hands rather than a mixer but you could use a stand mixer with the paddle if you like. 

Crumble topping, ready for the butter

Pour the filling into a casserole dish at least two inches deep.  Crumble the topping all over the filling.  I grab a handful of the topping, squeeze it together and then break it up which produces large and small pieces which is what you want.  

Place on a foil or parchment lined baking sheet (depending on your casserole dish, the filling may bubble over the sides could make a mess). 

Ready for the oven

Bake for 30 – 40 minutes or until the topping is browned and the filling is bubbling.


Good Morning Cinnamon Buns

There is something about starting a Saturday or Sunday with a great cup of coffee and a sweet treat.  Now I don’t have the biggest sweet tooth (I would always go for a piece of pizza vs. a piece of cake) but everyone else in the family does.  What I am a fan of is pulling a weekend breakfast together quickly so I can actually sit and enjoy it with everyone.  Making traditional cinnamon buns with a yeast dough, could take hours before they make it to the table, which basically means I have to get up hours earlier than everyone else rolls out of bed. There has to be a better way. 

One of the products I always have on hand is puff pastry and for good reason.  There are so many ways to use it from turnovers, pot pies, cheese sticks, appetizers, streusel and on and on.  I prefer Pepperidge Farm and each box has two sheets of frozen puff pastry which defrosts in the refrigerator overnight or on the counter in less than an hour.  These cinnamon buns came together in about 15 minutes and were in the oven for 30, a doable amount of time for me on the weekend.  By the time these are almost done and the house smells like a bakery, everyone starts to stir looking for breakfast.  I prefer straight forward cinnamon buns (and my kids do, too) but my husband loves pecan rolls so I put some pecans in some of the muffin cups and I have to admit, they were delish.

Keep in mind these are best eaten right out of the oven.  They will be super-hot but if they sit for more than a few minutes, the sugar will solidify.  These are great as is but if you’re an icing fan, you can whip some up in less than a minute. 

Ingredients

1 pkg                Puff pastry (two sheets), defrosted in the refrigerator overnight (I love Pepperidge Farm)

6 tbs                 Butter (I use salted butter)

1¼ c                Brown sugar

¼ c                  Pecans, coarsely chopped (optional)

2 tbs                Cinnamon

Preparation

Pre-heat your oven to 375.

Cut four tablespoons of the butter into 12 pats and place one in each of the 12 cups of a regular sized muffin pan. (I use a silicone muffin pan – click here for the link. ) Add one tablespoon of brown sugar and if you want pecan buns, then add one teaspoon of pecans.  Set aside.  Melt the remaining two tablespoons of butter.

Butter

Butter and Sugar
Butter, Sugar and Pecans

Unfold one sheet of puff pastry on a sheet of parchment paper. With a rolling pin and without pressure, roll the sheet to smooth out the seams. Brush the entire sheet (covering all edges) with melted butter, top with one tablespoon cinnamon and finally, ¼ cup brown sugar.   

Puff pastry ready for melted butter
With cinnamon
With cinnamon and brown sugar

Carefully roll the sheet by tucking the edge closest to you and rolling with two hands to keep it tight. 

Pinch the edges to close.  Cut the roll in half and then cut each half into three pieces.  Place each piece in the muffin tin, pressing down gently.  Repeat with the second sheet of puff pastry.

Place the muffin tin on a cookie sheet (to help make sure it remains flat in the oven) and then bake for 35 – 35 minutes or until the tops are brown and the filling is bubbling.

Once you remove the muffin pan from the oven, place a large platter on top and carefully invert to release each cinnamon bun.  If there is filling remaining in the tin, remove it quickly before the sugar solidifies.  Serve immediately but be careful as they will be hot. 

(Note: If you like icing on your cinnamon/pecan buns, combine ¼ c powdered sugar with 1 tablespoon milk and adjust with more milk or sugar till you get the consistency you want.)

Chicken and Saffron Rice

One pan meals are my go-to these days.  I love being able to take a pan or skillet from the oven or stove and put it right on the table for dinner.  This dish is a stepchild to Arroz con pollo, a traditional Latin chicken and rice dish with peppers, peas, etc.  My family can be a bit picky so this is a simplified, but no-less delicious, chicken and rice.  After a quick sear on the chicken (who doesn’t love crispy chicken skin!?) the rice and chicken finish cooking together in the oven.  The secret ingredient that takes this dish to the next level is saffron.  It may be a little pricey but even a tiny bit packs great flavor so it goes a long way. Until I met a dear friend who is Persian, saffron wasn’t something I used regularly.  After enjoying her cooking and learning from her, I’ve found a number of ways to use it.  Oh, and my 14-year-old loves rice with saffron (actually I think he likes hers better than mine but that’s another story!).  The saffron comes in threads but I learned that the way to get the most flavor is to crush it or grind it into a powder. 

This meal is perfect for a weeknight dinner.  It came together in less than an hour once all the ingredients were assembled. (Having all the ingredients chopped, measured and ready is critical to making sure you don’t miss a step or forget an ingredient.  The French call it mise en place which translates to setting up and I can’t stress how helpful it is.)  Since this dish cooks in the oven, I especially loved how the edges of the rice got a little crispy which added some texture.  I sauteed some broccoli with garlic and served that alongside the chicken and rice. 
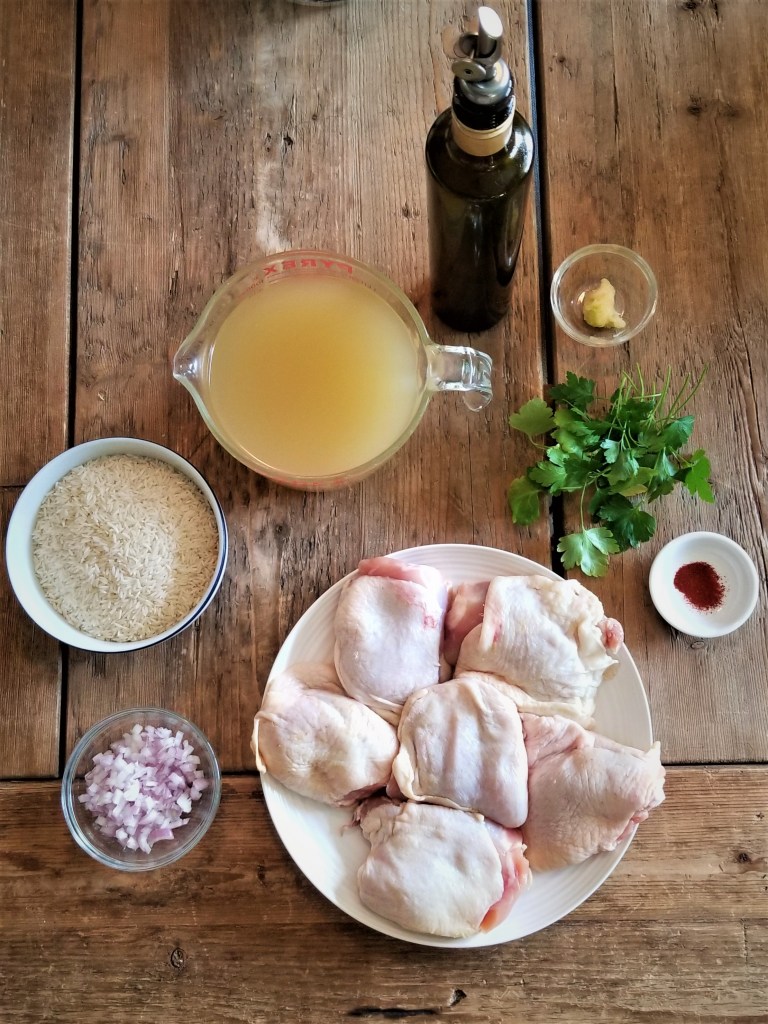
Ingredients

6                      Chicken thighs, bone in (you could use boneless but I fine these have more flavor)

½ c                  Diced shallots (you can use an onion if you don’t have a shallot)

1/8 tsp              Saffron, crushed or ground

1 tsp                 Grated garlic (on a microplane)

2 tbs                 White wine (I like a dry wine like Pinot Grigio)

1 ¾ c               Basmati rice

3 ½ c               Chicken stock

1 tbs                 Olive oil

1 tsp                 Seasoned salt

½ tsp               Salt, kosher

¼ tsp               Freshly ground pepper                                      

Parsley for garnish

Preparation

Pre-heat your oven to 400.

In a small bowl, combine the saffron with two tablespoons of stock and mix to help dissolve it. Set aside.

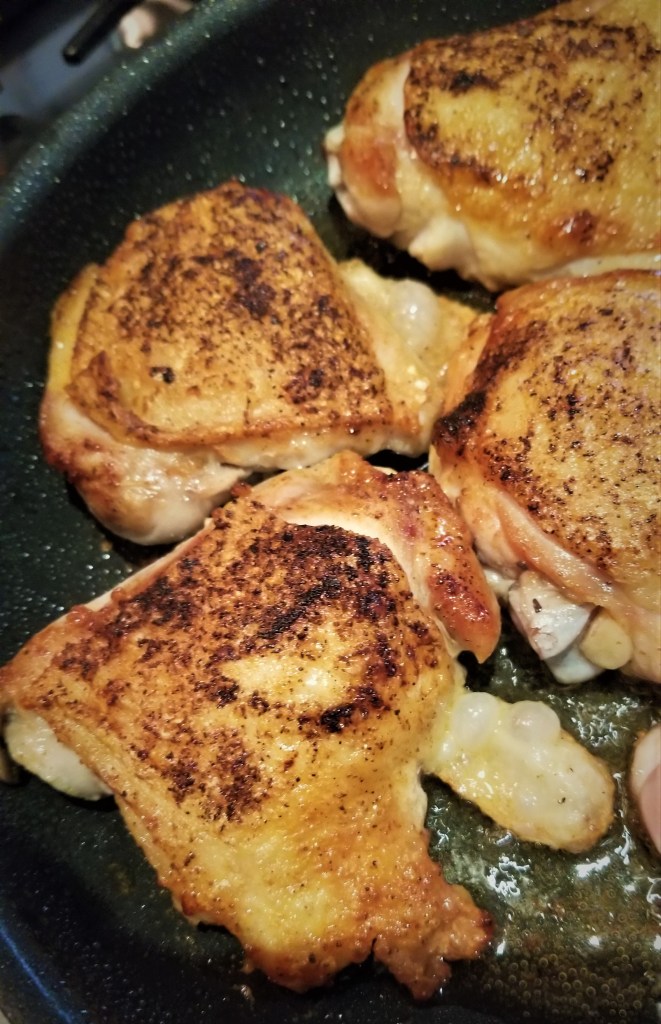
Pat the chicken thighs on both sides with a paper towel to make sure they are dry otherwise you won’t get a good sear on them.  Sprinkle both sides with seasoned salt.  In a wide, oven safe non-stick skillet (I love my Cuisinart casserole with glass cover), heat the olive oil and then brown the chicken, skin side down till golden brown.  Flip the chicken and sear on the non-skin side till brown.  You might have to do two batches so you can avoid crowding the pan.  Once the chicken is browned on both sides, remove from the pan and place on a plate.

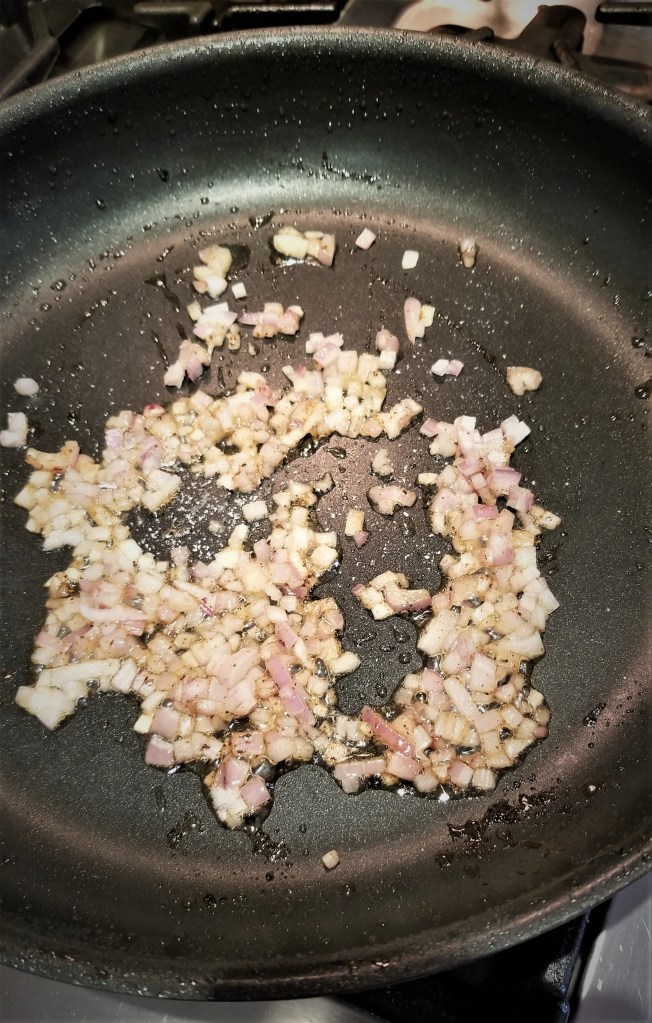
Pour off all but one tablespoon of the rendered fat and cook the shallot on medium to low heat until it is translucent, about 3 – 5 minutes.  Add the garlic and cook for another minute to combine. 

Add the wine and scrape the bits off the bottom of the pan, cooking for another minute.

Add the rice and mix with the shallot and garlic till coated and starting to toast. Add the stock and mix well.  Add the saffron mixture and combine.  Season with salt and pepper and bring to a simmer.

Carefully place the chicken (and the juices from the plate) in the pan on top of the rice, being careful not to completely immerse the chicken or you will waste the great crust you have.   

Place the pan in the oven, uncovered, and cook until the stock has been absorbed, about 20 – 25 minutes (depending on your oven and pan).  Check it after about 10 minutes. You can add more stock if you need to or move the rice around to check if the stock has been absorbed. 

Once the rice is cooked and the internal temperature of the chicken has reached 165 you can enjoy!

Crunch-tastic Zucchini Fries

When I was growing up, fried zucchini was immensely popular and I specifically remember ordering it at Houston’s restaurant.  They were crunchy and seemed like a better option than French fries since zucchini was also a vegetable, even though they were fried.  Houston’s served them with horseradish sauce and it’s a combo I loved.  I rarely fry food in a big pot of oil because it’s just not the healthiest and I hate the mess it makes in the kitchen.  I still love these fries and especially because they are baked in the oven.  Panko breadcrumbs are key to making super crunchy “fries” and using only egg whites instead of a full breading (eggs, flour and breadcrumbs) also makes these healthier than the ones I grew up eating.  Since these only call for egg whites, handle them gently so you keep all the crunchy goodness on the zucchini.

We made this batch and enjoyed them on their own but they would be a great appetizer for a ballgame or with burgers if you are looking for something beyond french fries.

Ingredients

3          Zucchini, medium to large

4 c        Panko breadcrumbs

1 c Italian seasoned breadcrumbs

½ c      Parmesan cheese, finely grated

1 tsp     Seasoned salt

4          Egg whites

            Canola spray

Preparation

Pre-heat your oven to 400, convection.

Cut the tops and bottoms off each zucchini and then cut them in half through the middle (not from end to end).  Cut each into sticks, roughly 18 per zucchini depending on how large they are.  Set the cut zucchini on a paper towel to ensure they are dry before you prepare them. 

Combine the breadcrumbs, cheese and seasoned salt in a bowl or casserole dish and set aside.

With a whisk, beat the egg whites till they are just frothy.  Add the zucchini, a few at a time and then one-by-one, dredge in the breadcrumbs. 

Be sure to press the breadcrumbs onto the zucchini.  Carefully place on a parchment-lined cookie sheet in a single layer being careful not to crowed the fries.

Spray the zucchini with canola spray, which will help them brown, and cook at 400 degrees on convection until golden brown and tender, about 20 – 25 minutes.

Blueberry Muffins

It’s blueberry season so I am always looking for ways to use them! I actually like blueberries cooked more than I like them raw. I love making blueberry pies that remind me of Summers in Maine along with crumbles, pancakes and these delicious muffins.  I’m not one for complicated recipes or ingredients so I especially love how easy this is.  Buttermilk adds great moistness to the muffins and the lemon zest amps up the blueberries.  Lemon and blueberries are great together and even if a blueberry recipe doesn’t call for adding juice or the zest, I do and I think it makes a difference.  

One of the things I try to avoid when I bake with blueberries is having purple batter.  When fresh blueberries are added to a batter the blueberries tend to fall apart which makes a messy, purple batter.  I like to see the blueberries in the muffins so I freeze the fresh blueberries (after they are washed and picked over for stems) and keep them in the freezer till I am ready to mix them into the batter.  I also prep the muffin tin so the blueberry batter doesn’t sit on the counter for too long.

If you are hosting a brunch or want fresh blueberry muffins in the morning, make the batter the night before and simply combine the batter and blueberries before you pop the muffins in the oven. Enjoy!

Ingredients

3 c        Flour

4 tsp     Baking powder

½ tsp   Salt

1 c        White sugar

½ c      Milk

¼ c      Buttermilk

2 c        Frozen blueberries

2/3 c     Vegetable oil    

2          eggs

1 tsp     Lemon zest

            Raw sugar for muffin tops

Preparation

Preheat your oven to 400°.

Combine the flour, baking powder, salt and white sugar together in a large bowl. Stir together milk, buttermilk, oil, eggs and lemon zest in a separate bowl. 

Add the wet ingredients to the dry ingredients, stirring just until everything is mixed.  Fold in frozen blueberries (the batter will be thick) but be careful not to over mix or your blueberries will start to defrost and pop.   

With an ice cream scoop, place the batter into a muffin pan (about 3/4s full).  If you aren’t using muffin liners, spray the pan with canola spray.  Sprinkle each muffin generously with the raw sugar.

Bake at 400° for 20 to 25 minutes or until tops are golden and a wooden pick inserted in the center comes out clean.

Remove from pan and cool on a rack.

Bacon Ranch Pasta Salad

I love pasta salad at a BBQ or picnic (maybe a little too much) and this is the one that I get the most requests for.  Nothing complicated and simple ingredients but the combination is a winner.  I especially like the bacon in this because everything is better with bacon, but you could easily omit it and make this vegetarian.  

I find that making the pasta the day before and tossing it with a little mayo and ranch is the best approach.  If you toss the pasta with the dressing right after you cook the pasta, the dressing will be absorbed and the pasta will need more than I’ve listed.  Tossing the pasta and putting it in the fridge overnight is best but a few hours in the fridge is fine too.  I’m a fan of saving steps where it makes sense and since you need to blanch the broccoli for a few minutes, I use the same pot and water I cooked the pasta in and instead of pouring the pasta and water into a colander, I use a spider (hand held strainer) or a small strainer to remove the pasta.  I highly recommend using fresh broccoli.  Frozen broccoli will be soggy and turn to mush in your salad.  By blanching the fresh broccoli and then shocking it in a bowl of ice water, it will stay bright green and firm.

Personally, I don’t love tons of dressing on my salads or on pasta.  I found the perfect balance of flavor and dressing by adding some ranch seasoning to the pasta salad rather than more ranch dressing or mayo. I always have ranch powder (specifically Hidden Valley Ranch) on hand for salads, dressings, rubs, etc. But you can add a little more mayo or ranch if you like – there are no rules!

Ingredients

1 lb.                  Short pasta (I like fusilli, gemelli, bow ties or large elbows)

3 c                    Broccoli florets, blanched

½ lb.                Thick cut bacon, thinly sliced

1 ¼ c               Mayonnaise (I love Hellman’s)

¼ c                  Ranch dressing (homemade or your favorite brand, mine is Hidden Valley Ranch)

3 tbs                 Ranch powder (Hidden Valley Ranch is my favorite)

1/3 c                 Milk (low fat or whole)

Preparation

Cook the pasta until it is al dente (you don’t want mushy pasta or it will break when you mix it).  Remove the pasta (reserve the water in the pot if you are blanching the broccoli) and rinse under cold water.  Toss with ¼ cup each of mayo and ranch dressing and refrigerate for at least four hours or overnight.

Blanch the broccoli florets for about 2 minutes in boiling water.  Remove the broccoli and place in a bowl of ice water to stop the cooking process (aka shocking).  Drain well and pat dry.  I make the broccoli when I make the pasta so if you make the pasta the day before you are going to serve it, just put the blanched broccoli in the refrigerator till you are ready to assemble the pasta salad.

To make the bacon, cut ½ pound of bacon into ¼ inch wide strips and cook till just done.  Drain the pasta and cool till you are ready to assemble the whole dish.

To pull the pasta salad together, place the pasta in a large bowl.  In a measuring cup, combine 1 cup mayo, 3 tablespoons ranch powder and 1/3 cup of milk and mix well.  Pour over the pasta and combine.  Add the broccoli and bacon and season with salt and pepper to taste (I find the ranch powder has more than enough salt but feel free to customize according to your own taste).  

You can serve immediately or place in the refrigerator until you’re ready but I recommend assembling this the day you plan to serve it. 

Chicken Parmigiana Meatballs

This may be my new favorite recipe I’ve created.  I’m all for eating heathier but I don’t want to give up great flavors and I know my family isn’t willing to go without their favorites.  That’s exactly how this recipe was born.  It has the delicious flavors of cheese and marinara sauce that make chicken parmigiana so fabulous but without the added breading and oil.  Instead of frying chicken cutlets, these juicy meatballs cook in the oven.  Less calories, no mess but tons of flavor are the perfect combination when I’m creating a recipe.  I didn’t this time but moving forward I will double or triple this recipe and pack the freezer for sure.  Like my traditional meatball recipe (also on eyummykitchen.com), these are great as a snack, on pizza, mixed with pasta and vegetables so make a batch and keep them on hand.  These make a quick, no stress weeknight meal especially if you use your favorite jar of marinara.

Ingredients

1 lb                   Ground Chicken

1                      Egg, lightly beaten

1/4 c                 Italian bread crumbs

1/4 c                 Panko bread crumbs

1/2 c                 Parmesan, grated

1/4 c                 Warm water

1 tbs                 Dried parsley

1 tsp                 Salt

½ tsp               Pepper

1 – 2 tbs           Olive oil

3 cups    Marinara sauce (I like Rao’s or Patsy’s)

1 pkg                Fresh mozzarella, sliced to top each meatball

Preparation

Preheat your oven to 400 degrees.

Combine the ground chicken, egg, bread crumbs, parmesan, parsley, salt and pepper in a large bowl.  Add the water a little at a time.  The mixture should be wet but still hold its shape. 

Use a small ice cream scoop to form the meatballs.  You can roll them in your hands to shape them but if you do, be sure to wet your hands so the mixture doesn’t stick. Place the meatballs on a plate and put the into the refrigerator for about 20 minutes to let them firm up. This recipe should yield about 22 – 25 meatballs.

To cook the meatballs, line a cookie sheet with foil and parchment paper and coat the parchment with a drizzle of olive oil. Place the meatballs on the pan and bake until they start to brown, approximately 20 minutes (the internal temperature should register 165 degrees). 

Once you remove the meatballs from the oven, set it to broil.  In an ovenproof dish (pan or casserole) place two cups of marinara sauce.  Place the meatballs on top of the marinara in the dish and spoon about a teaspoon of the remaining marinara over each one.  Top each with a slice of mozzarella (about ½ oz each) and place in the oven.

Cook until the cheese and sauce are bubbling, about 5 – 8 minutes depending on your oven.  Serve with pasta.  


Split Pea and Ham Soup

When I host Easter brunch or dinner for family and friends, I love to serve a ham.  It’s perfect for brunch and goes well with eggs and biscuits served at room temperature.  For dinner, macaroni and cheese or scalloped potatoes along with lots of veggies is ideal.  I glaze the bone-in ham (usually spiral cut) with a mixture of apricot jam and mustard and baste it regularly so the edges get crispy.  As good as a well-cooked ham is for Easter, what I really like are the leftovers. 

I hate wasting food so I save as much of the ham as possible.  Some gets frozen for eggs, casseroles and quiches while some ends up in grilled ham and swiss sandwiches.  Even the smallest ham produces lots and lots of meat! But the best part is the large bone – the shank – that remains after most of the meat is removed.  It is a flavor bomb (a good thing!) and I think the perfect way to use it is to make split pea soup.  It’s one of the easiest soups to make and adding the shank to the simmering soup gives it a deeper flavor beyond the stock and vegetables.  If you’ve never used dried split peas, you can find them in any supermarket and normal they come in one-pound bags.  No prep needed – they go right from the bag to the pot.

This recipe will net at least three quarts of soup and it freezes very well.  I use an immersion blender to create a smooth texture although I like to actually taste and see the vegetables so I usually remove a couple of cups of the soup before I blend it and then add them back in.  Once the soup is done, I remove the shank bone and add some diced ham.  Ham can be salty so I wait till the soup is almost done before I see about seasoning with salt and pepper.  A drizzle of olive oil and a dash of Tabasco (for me) is the perfect finish.  Some croutons wouldn’t be bad either!

Ingredients

1 c                    Diced onion (I use sweet onions)

1 c                    Diced carrots

1 c                    Diced celery (I like to use some of the leaves for extra flavor)

1 clove            Garlic, whole

2 tbs                 Olive oil

1                      Ham bone (most of the meat removed but some is fine)

1 lb                   Dried split green peas

6 c                    Chicken or vegetable stock (low sodium if not homemade)

1/3 c                 Whole milk (optional)

1 ½ c               Diced ham

                        Salt & Pepper to taste

Preparation

In a large Dutch oven or pot, add the ham shank and the onions, carrots, celery, garlic and olive oil. Cook for about 5 – 8 minutes or until the vegetables are fork tender.  Add the split peas and stir until the peas are coated and mixed with the vegetables. 

Add the stock and simmer until the peas are falling apart, about an hour.  Stir frequently as the peas like to clump together on the bottom of the pot.

Remove about two cups of the soup (give or take) and blend the remaining soup till smooth with an immersion blender right it the pot.  Add the two cups of soup back to the soup along with the diced ham and milk. 

Cook for another 15 minutes, stirring frequently, and salt and pepper to taste.