This is a staple in my house which is great with me as I always have homemade stock in the refrigerator and the rest of the ingredients in my pantry. We love soup and who doesn’t, especially on a cold night. Nothing warms you up like soup. My family on my mom’s side is Hungarian and boy do Hungarians love their soup. I remember as a little girl visiting my Aunt Anna and Uncle Geza in Florida and regardless of how hot it was, my Aunt would make a fresh pot of soup every single day for my Uncle’s lunch. It could be 100 degrees – they never turned the air conditioning on – and a fresh, homemade soup was served. Hard to teach and old dog new tricks but now that I’ve grown up, I appreciate a good bowl of homemade soup and wish I could go back and watch my Aunt at the stove.
This soup is always on the menu at our house for Jewish holidays (my husband is Jewish, as are our kids) so I’ve made lots of matzo balls in my time and I think this is the perfect balance of denseness and fluffiness. Too much on either side of the scale makes a passable matzo ball but this recipe produces a perfect ball every time. And I’ve got a family full of opinions, most notably my husband Mark, who gives this the seal of approval (took me 20 years to get it on this!).
All matzo ball recipes call for some fat – usually vegetable oil. When I make stock (check out my chicken stock recipe) I save the chicken fat that floats to the top or I buy it already rendered in the supermarket (Empire is the best). It lasts forever in the refrigerator or freezer and a little goes a long way. It adds amazing flavor but if you want to stick with oil, that’s fine too. The other thing I do is replace the liquid most recipes call for with club soda or seltzer. Water is fine but the bubbles help add a lightness to the mixture you otherwise wouldn’t get.
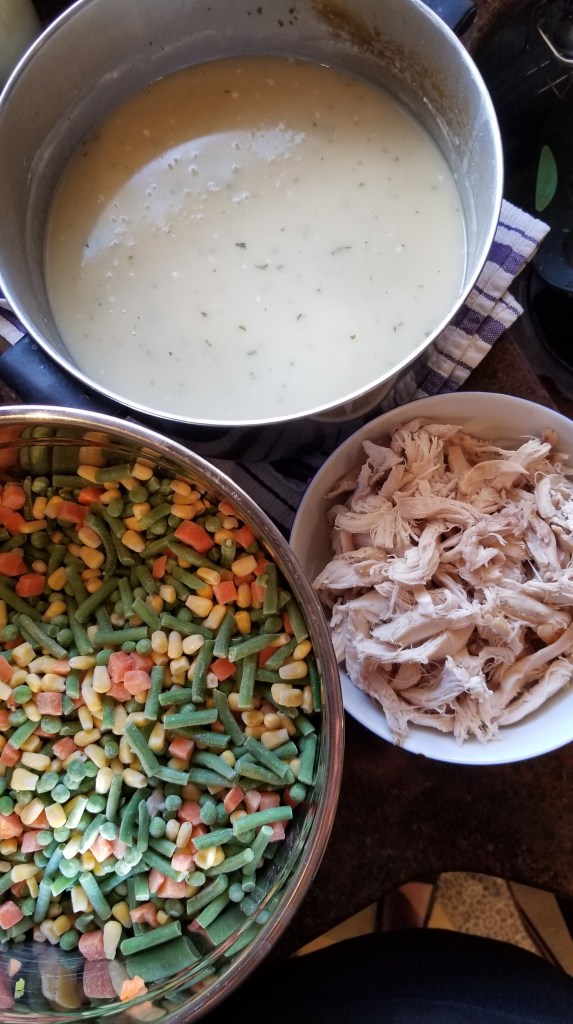
These take a bit of time to cook – at least 45 minutes depending on how big they are – and I cook mine separately from the soup I serve them with. I find the cooking liquid gets cloudy and I use store bought stock to cook the matzo balls in (save the homemade stock for the soup you’re serving). I use a carton of stock (which is 4 cups) and the about 2 or 3 more cups of water to cook the balls. This gives them more flavor since as they cook, they absorb the liquid and double in size. Plain water would be bland and just plain boring for me. Once they are cooked, remove them from the cooking liquid and they will keep in the refrigerator, covered, for a few days so if you want to make them ahead, you can. If they are cold, reheat them in the soup you’re serving on a very low heat to warm. You can serve them immediately as well.
Ingredients
2 tbs Vegetable oil or rendered chicken fat (aka Schmaltz)
2 Eggs. Large and beaten
½ cup Matzo meal (I use Manischewitz) and most grocery stores carry it
2 tbs Club soda or still water
2 tsp Kosher salt
1 32oz carton Chicken stock (I use Swanson chicken broth or stock, low sodium) to call the balls
2 qts Chicken stock to serve
Directions
Mix the eggs and fat/oil together in a bowl, add soda/water, salt and matzo meal mixing until everything is incorporated. Place in the refrigerator for 30 minutes.
Meanwhile, in a large pot bring four cups of store-bought chicken stock (one carton) and two – three cups of water, depending on the size of your pot, to a rolling boil. I use a wide topped pot so the matzo balls have room to expand. After 30 minutes, form the batter into small balls (I use a small ice cream scoop and dip it in water to avoid the batter sticking) and carefully drop them in the pot. Reduce to a simmer and cover for 45 minutes to and hour. I usually sacrifice one to taste and make sure it is cooked through. To serve, I bring my homemade stock almost to a boil and place two matzo balls in a bowl with the soup. I usually don’t add chicken or veggies but you can do whatever your family likes.